Page Tiling
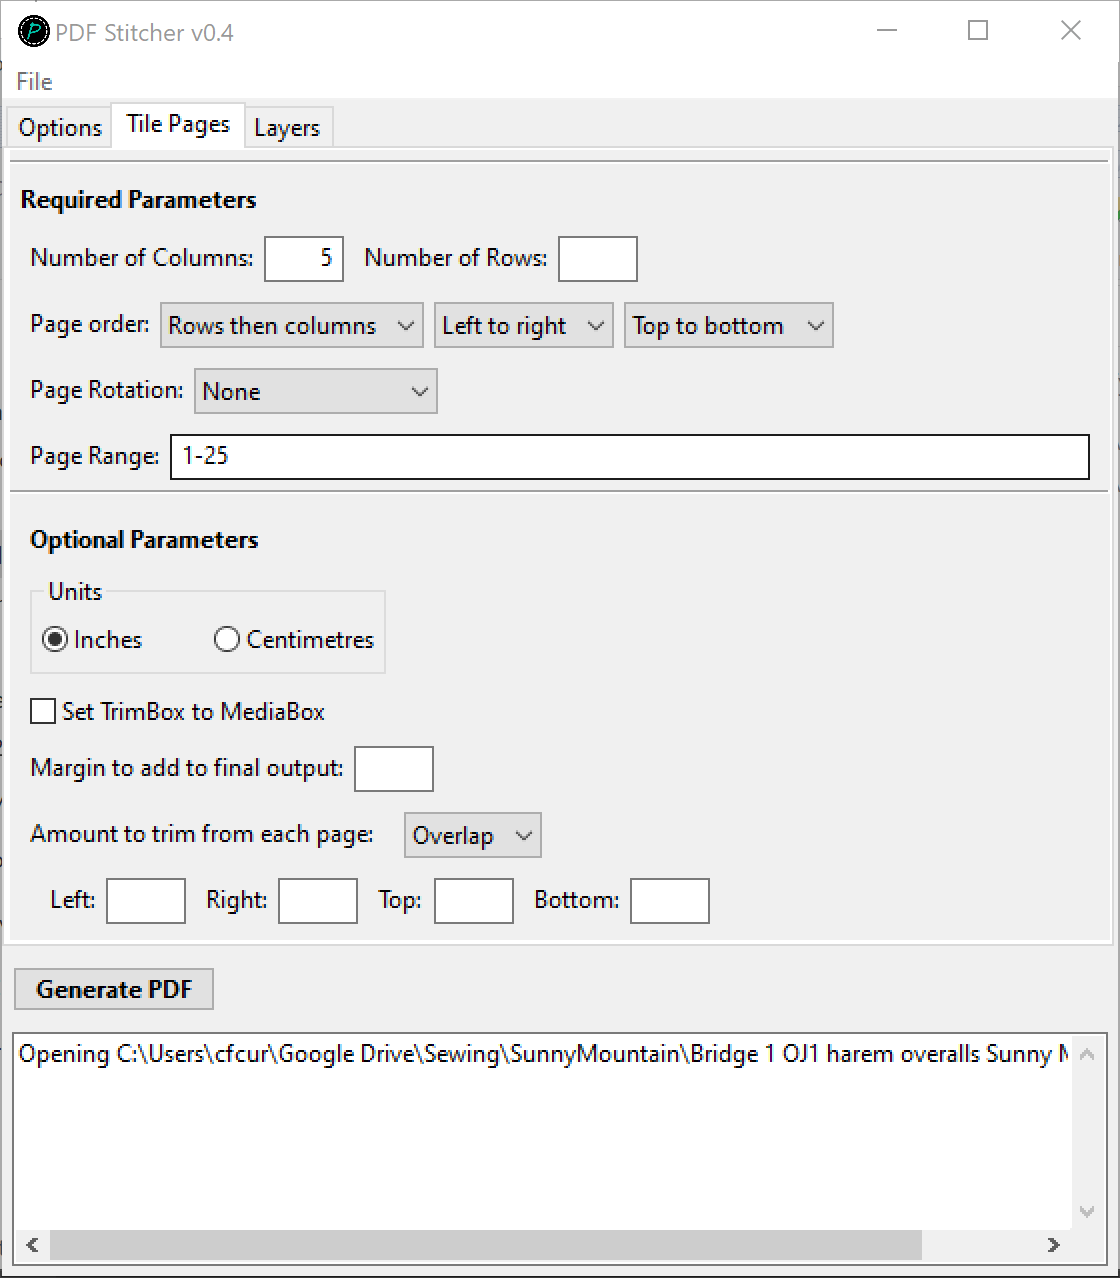
The page tiling tab is where you give PDFStitcher all the information needed to digitally “tape together” the A4/letter-sized patterns.
Required parameters
Number of columns/number of rows
This defines the grid that the pages will be tiled on. Only one of columns or rows needs to be specified; the other will be calculated based on the total number of pages. If both fields are filled in and they don’t agree, the columns entry takes precedence. For example, if you are tiling 28 pages and you say 5 columns and 5 rows, a grid of 5 columns and 6 rows will be used (the last row will be short).
Page order
This defines in what order the page range will be filled in to the grid. While many patterns work with the default setting, this might be required if the result is jumbled.
Page rotation
This tells PDFStitcher whether or not to rotate the pages before tiling. This is relative to the original position, so if they are already landscape and tiled in landscape, leave the rotation as None.
Page range
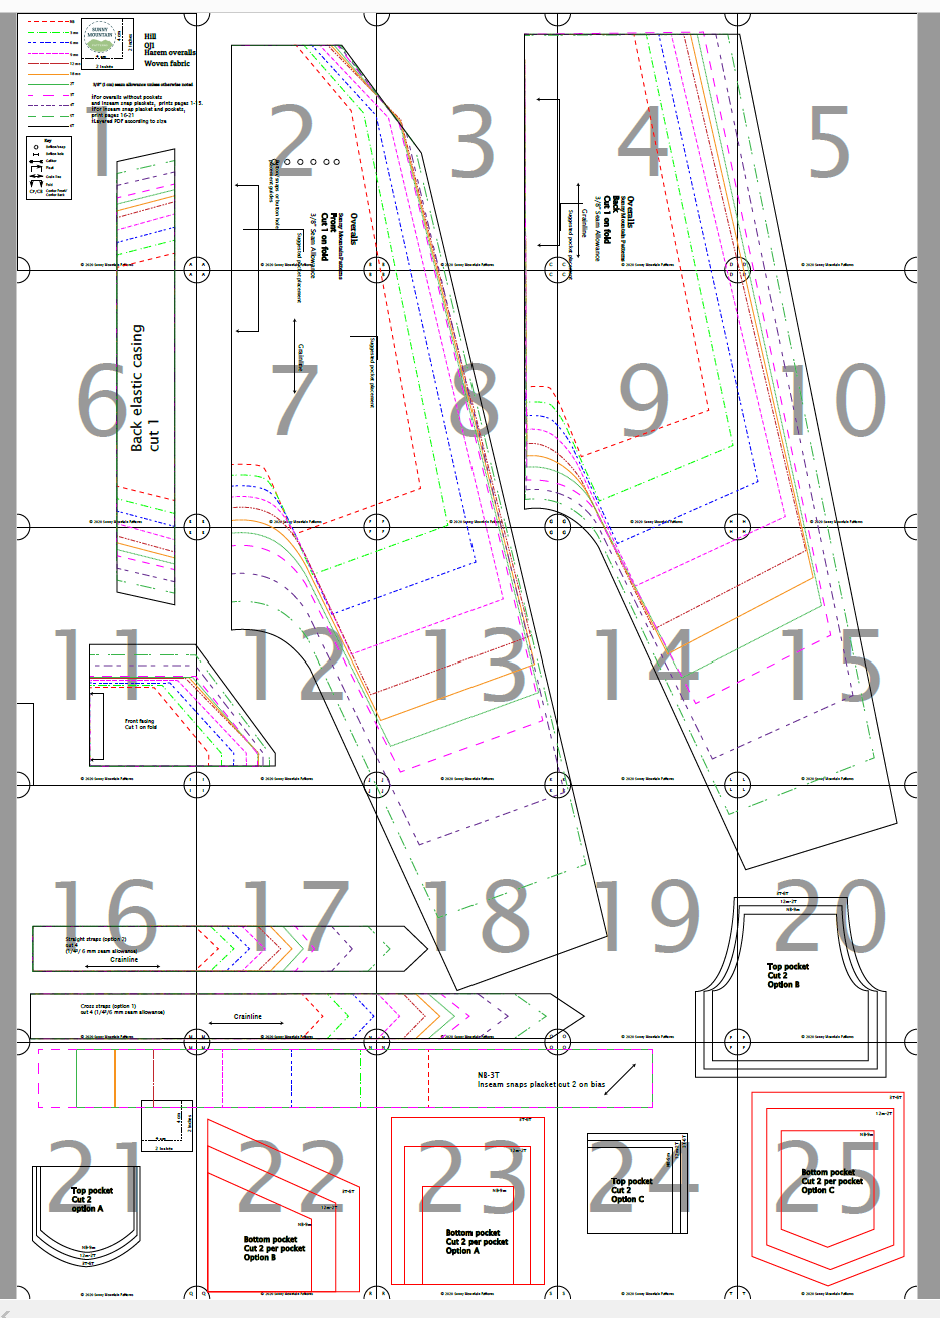
This is the same field as on the “Options” tab, duplicated here for convenience. The page range to use depends on the pattern. Some are simple, with the pattern assembling into a complete grid. The Sunny Mountain example is one of these - simply set number of columns to 5 and PDFStitcher will tile all 25 pages into a 5x5 grid:
Other times, some rows are shorter than others, or pages need to be skipped due to different pattern options, etc. The page range text box accepts comma-separated lists combined with hyphenated page ranges. In addition, blank pages can be added with a 0. For example, consider the following layout:

This layout would be defined with:
- 4 columns or 3 rows
- Rows then columns, left to right, top to bottom
- Page range 1-7, 0, 0, 8-9
Optional parameters
These parameters can be left blank for many no-trim style patterns. The units selector sets the units for both the trim and margins.
Set TrimBox to MediaBox
This obscure-sounding checkbox changes the PDF TrimBox to match the MediaBox. If you want to know exactly what they mean, this site gives a very detailed description. Basically, this checkbox can help in some scenarios where you think all the settings are right but the pages in the output are weirdly cropped, shifted off-centre, or otherwise misbehaving.
Margin to add to final output
When projecting patterns it can be helpful to have a large margin around the pieces to allow you to position each piece wherever you like. A common choice is 20 inches, but you can put whatever value you like. This can be used even if the input PDF is only one page, so your page range to tile is 1-1.
Caution: While PDFs of any size can be created, Adobe Reader will not open anything larger than 200”
Amount to trim from each page
Many PDF patterns require trimming before taping together. PDFStitcher gives the option to trim or overlap by the amount specified for each side. Some designers say how much to trim in the instructions, but others require measuring or trial and error. The measurement tool in Adobe Reader can be helpful for this.
Trim or overlap? Some patterns need to be trimmed as they tile together with overlapping whitespace, while others look better with overlap.